Tony has asked me to give a little more info on the creation of HDR images like the ones I post sometimes on the ol' blog. I did a basic post on this a while back, but didn't have the visual walk-through that some might find helpful. :) All images should take you to larger versions. If not let me know.
So here goes.
1. It all starts with taking your initial pictures. You will need three pictures. One normal, one overexposed (lots of white), and one underexposed (lots of black). To get the best possible HDR image here are some tips:
- Use a tripod. By far the best advice I can give. This will save tons of time down the road with weird ghosting artifacts, and edges not lining up
- Use the same settings for all pictures.
For point and shoot cameras this just means setting your white balance so that it doesn't change throughout your pictures set. Then adjust for the different exposures using your E +/- button (camera must be in manual mode to do any of this)
For those with bigger and badder cameras it means setting the white balance, ISO, and aperture. Adjusting for your separate exposures with the shutter speed will yield the most consistent results.
SOME cameras (mine does, thankfully) will have Auto-Exposure-Bracketing (AEB), which does the all of this stuff for you.
- Visualize your shot. Not all pictures look good in HDR. Personally, I think most photos look better without HDR. What you want to look for is photos that naturally have a very light and very dark areas naturally. Taking a picture of a flat grey sky will yield a flat grey HDR, simply because that is all there is to the scene. You are looking for scenes where you can't get the whole range of tones available shoved into one picture. And don't feel constrained by taking only 3 pictures. Take 5 or 9 or 20. However many it takes to capture all the dynamic range that you can.
- Keep in mind. Since you are taking multiple exposures, anything that moves in your scene won't show up correctly in your final image. Flags, cars, people walking, all sorts of things can move that you don't even realize until you are creating your HDR. You can remove these in photoshop to some extent, but it is time consuming.
You can create an HDR from one Camera RAW, but it won't be as good as a multiple exposure shot. Of course, this means that you can create an HDR with moving objects and not worry about removing them later. :)
Now, as with all rules: feel free to break these as often as you want. These are just guidelines for optimal shots. I rarely use a tripod (because I'm lazy and don't like carrying one), I always end up having something move in my shots, and I very rarely visualize my shots. My thinking is that digital shots are cheap, so take a normal photo, and then take some varied exposures afterwards. Play with them and see the difference between HDR and normal. Pick the one that looks better.
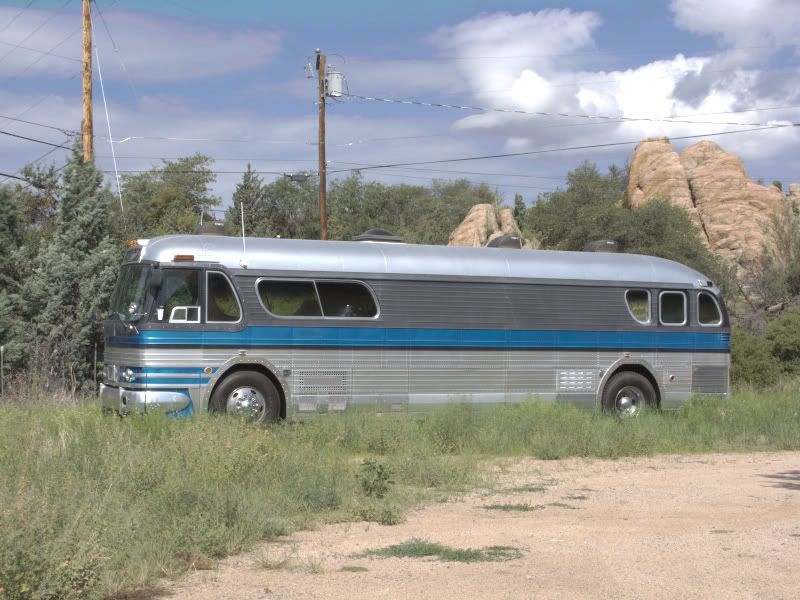
Okay so now that all of that is out of the way, here are the shots I will be using for this tutorial. My exposures were -2.0, 0, +2.0, and were all in Camera RAW format out of my camera:
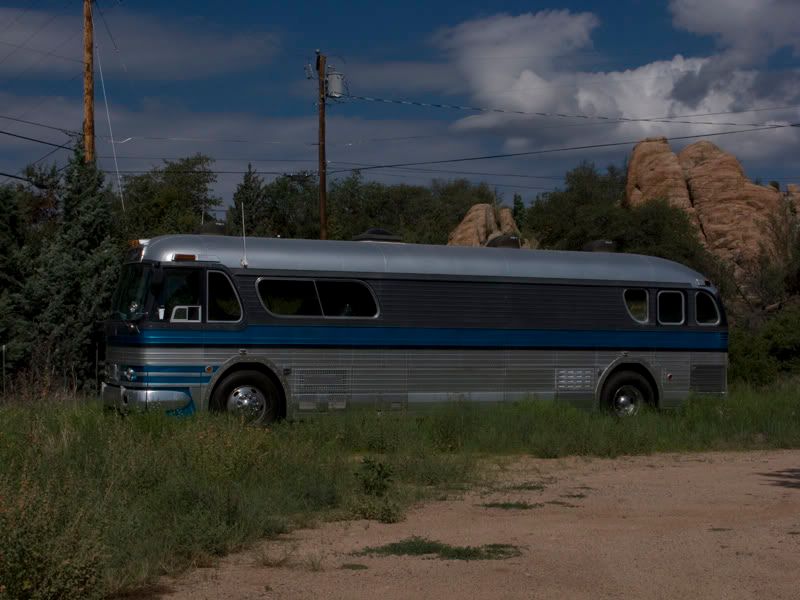

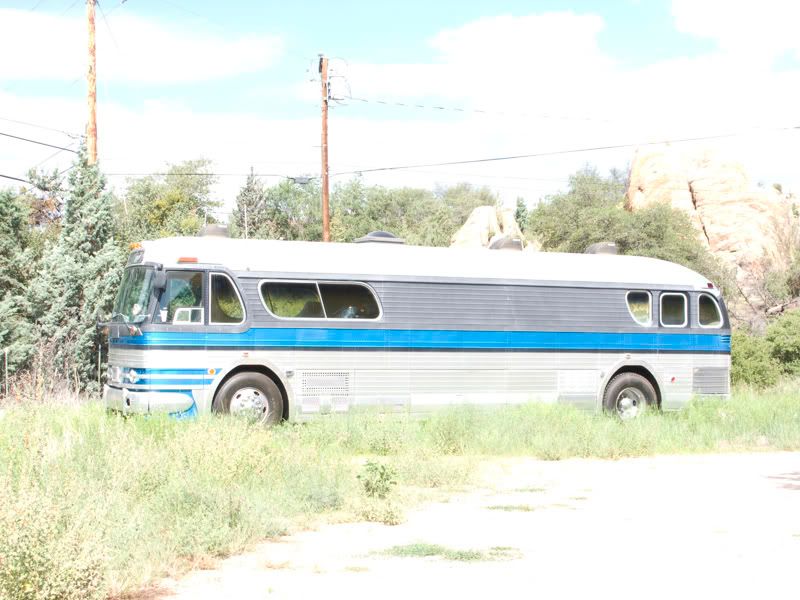
Now, looking at these photos in retrospect, this is not a great image to use HDR on. There isn't a lot of range in the tones (thanks to early-morning light), but since I already created the whole tutorial using these photos, we will go with it and see what happens. :)
Now that we have our photos, we have to pull them into Photoshop and merge them together. This is easy, you just go File - Automate - Merge to HDR:

Once you choose your files and hit go, photoshop will give you something like this:
Pretty boring right? Why? Because photoshop doesn't do any tone-mapping, and your computer doesn't know how to display all that range that we now have in there, so it just shows a low-contrast version of itself. So now we have to go elsewhere for a little tone-mapping goodness. So we save the file - AND THIS IS VERY IMPORTANT - as a Radiance file. File - Save As - under Format select 'Radiance'. If you save it as any other file type you will lose most of your dynamic range that you have worked so hard for.
Now, open it in Photomatix!! (Go ahead and download the free trial.... you know you want to!). Once we open it in photomatix we get this:
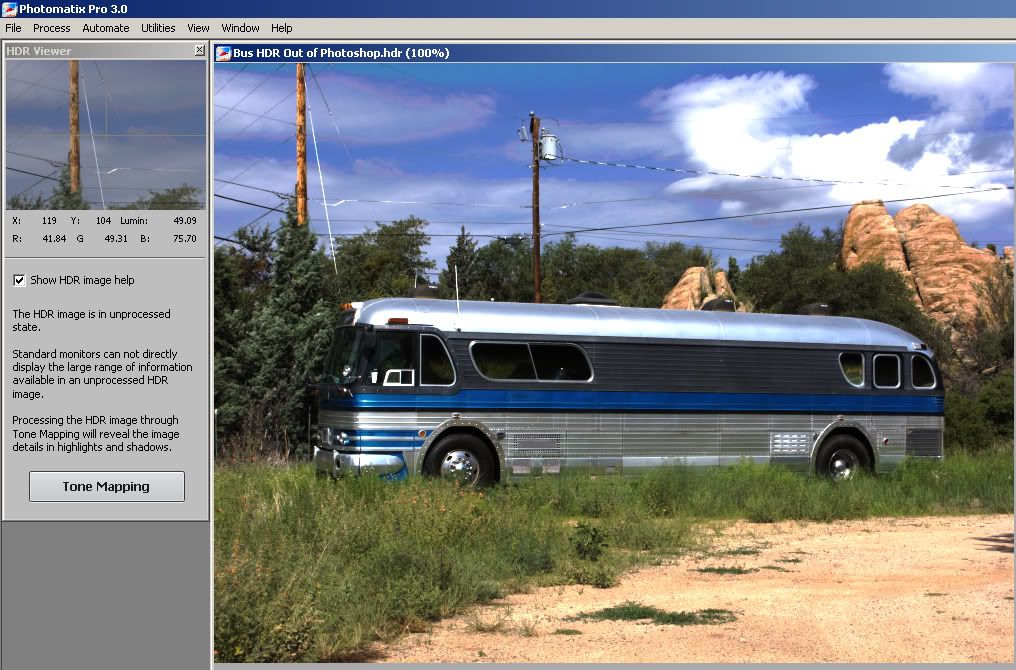
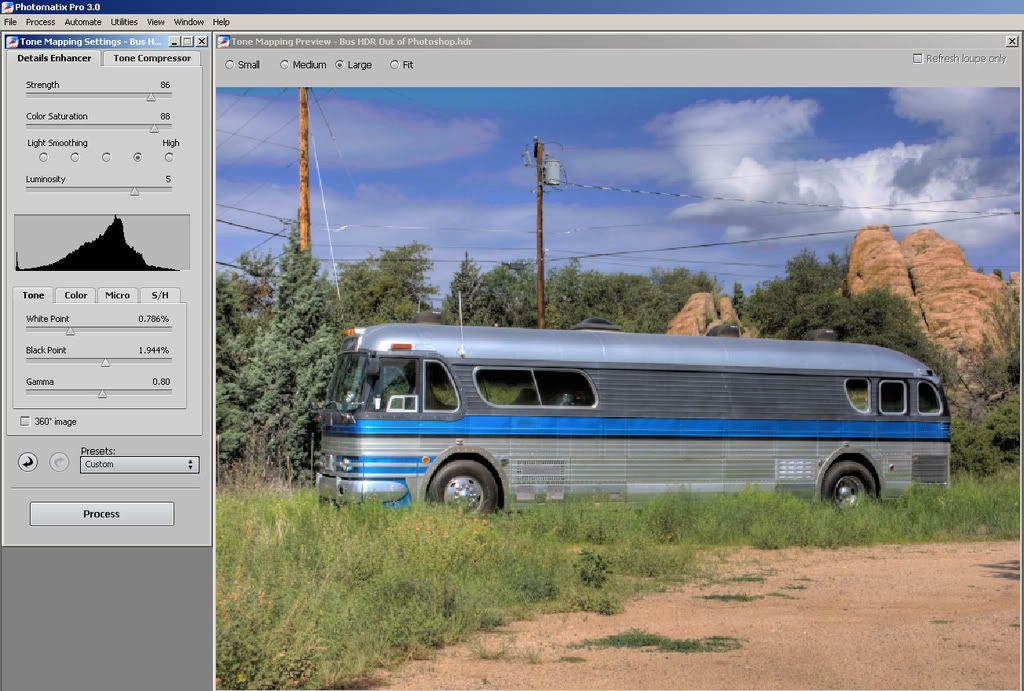
Not nearly as boring, but still not what we want. This is just Photomatix's interpretation of that grey image out of photoshop. Now we have to tone map it. You see that Big Button on the left that says 'Tone Mapping', go ahead and click that.
Now you will see a tone-mapped version of your image that uses Photomatix default settings. A lot of times this might be enough, but I generally go through and tweak it for each image. I normally pump up the strength and color saturation to the high 80s, up the luminosity, adjust my white and black points to whatever looks good on the image, and up the gamma a bit.
Individual highlight and shadow saturations (under the color tab) I change to whatever looks good on the image.
Microcontrasting (under the micro tab) goes nearly all the way up, and microsmoothing goes about 1/3 of the way up.
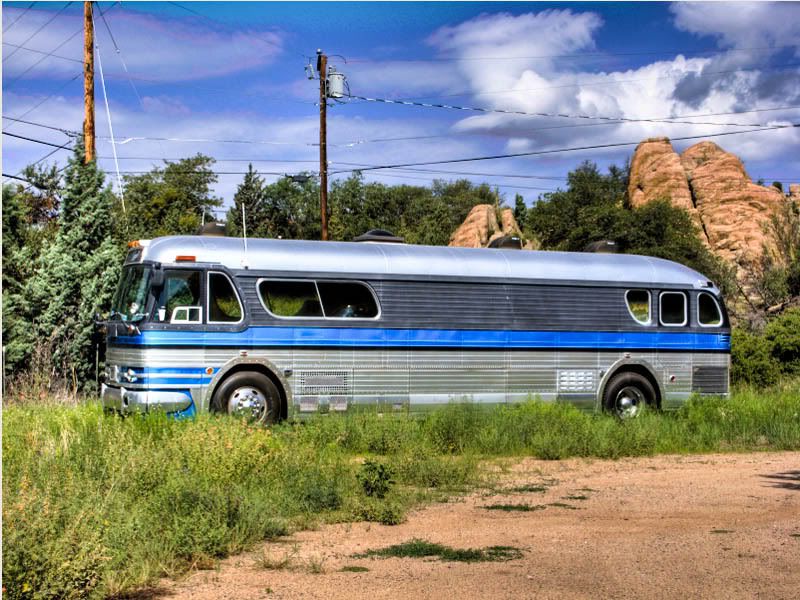
Now we have this fine specimen, which is a perfectly fine image, and could easily go out to the internet.:

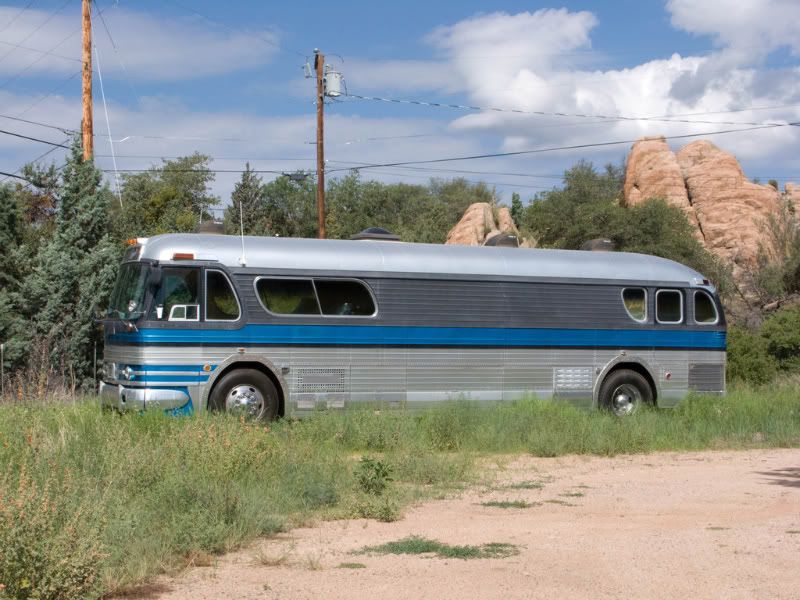
Personally, I like a little different look to my HDRs so I imported it into lightroom, and upped the contrast and clarity, as well as added a bit of an S shape to the tone curve, which netted me this image (vs. the single Un-edited normal exposure below). It is certainly an improvement, and does add quite a bit of interest to the image. So for 15 minutes of time - I would totally call this one worth it. Now if I was posting this for my portfolio, or something equally unlikely, I would go into photoshop and fix the magenta fringing on the clouds to the left.
POST NOTES:
- You can also merge your HDR with photomatix, and with the current version (3.0) it does a pretty good job. The reason I use photoshop is because it is better at aligning images and not creating artifacts. Since I normally hand-hold my exposures this is very beneficial.
- To see the wild side of what you can do with this, check out Rich's HDR stuff. He has spent a lot more time working with HDR than I have, and even has some HDR work up in a local gallery.
- Questions? Feel free to email or comment.
4 comments:
Thanks Tom, very instructive. The shots you've been showing on the blog emphasize one other point in addition to the techy parts and that's your ability to judge what is a good subject for super saturated effects and what is not. You have a disciminating eye.
Tony - HAHAHAHA, you're funny! Seriously though, I really do take tons of exposures (4000+ since buying the G9 5 months ago) so there are always plenty to play HDR with.
I rarely actually keep the HDR versions as I don't generally like them. Out of 1700+ photos I have 19 HDRs.
They do make for interesting blog pics though. :)
I say that the HDRs are photos for the science fiction reader, esp. those wild Dells photos that Rich has been publishing...
GrannyJ - I agree, some of the HDR can get pretty wild, and a little outside the realm of reality. Generally I try not to overdue the effect in my photos. Sometimes it works, sometimes it doesn't. :)
Post a Comment